The cheapest energy source in the world as of 2017 is solar energy, one of the few alternative sources that do not pollute or harm the environment.
Solar energy users globally save 75 million barrels of crude oil annually, which would be a significant step toward returning our planet to its natural state. Solar energy is not only affordable and environmentally good but is also very accessible and usable at any time, even at night.
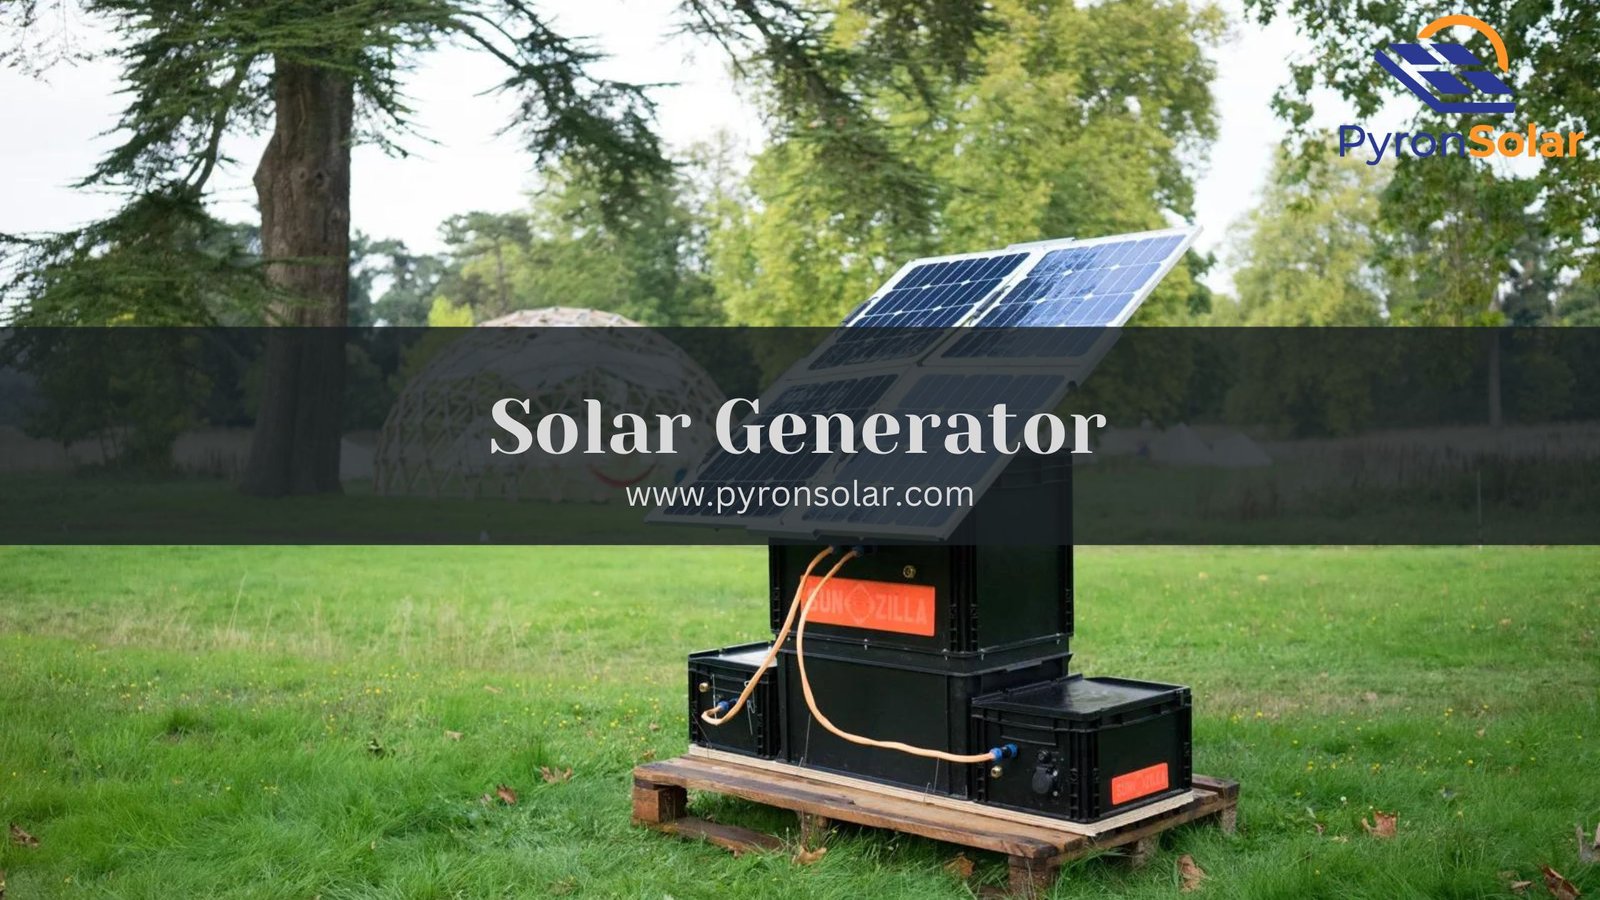
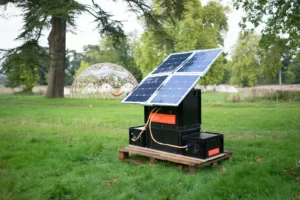
With a DIY solar generator, you can completely cut your ties to the grid and utilize it to power and charge all your devices, including small items.
How to Step-by-Step Assemble Your Own Solar Generator
It’s now time for me to help you put your solar generator together by doing the below actions:
- Make your case
Solar power equipment must be plug-and-play. So, without opening the case, ensure all the outlets are reachable. Utilizing a hole saw, carefully install the outlet plug after cutting through the case. Apply silicone to seal it after that. A second hole is required to connect the solar panel to the charger. I advise utilizing silicon-sealed waterproof electrical connectors.
- Put the battery in
It would help if you mounted the battery in your case first because it makes up the majority of your DIY solar generator kit. Although LiFePo4 batteries can be placed anywhere, I advise doing so in the case’s corner.
- Put the solar charge controller in place.
Attach the solar charge controller to your case with glue. Ensure adequate room for the wiring to solar panels and the battery.
- Putting in the inverter
The second-largest component, the inverter, can be mounted on the wall close to an outlet. I advise using straps to make it simple to take them off for maintenance. Ensure there is enough room around the inverter so air can move freely.
- Connect the wiring and the fuse.
It’s time to wire your system now that each component is securely fitted within your casing. Connect the inverters to the battery and also the battery to the solar charge controller using a 12 gauge wire (12 AWG).
Next, connect your solar panel’s extension cord to the solar charger (12 AWG). Three fuses are required in the following areas:
- Between the solar panel and the charge controller.
- Between the battery and the charge controller.
- Placed between the inverter and the battery.
Parts and Components:-
You must first gather all the parts and elements that go into your solar generator.
Rugged case:- You require a strong, watertight enclosure to hold all the necessary components.
AC solar power inverter:- You may convert the DC voltage in your battery into the AC voltage needed by devices by using a solar power converter.
Solar panel:- The solar panel gathers energy from the sun and transfers it to the battery. One of the generator’s parts that will be visible the most will be your panel. Therefore it must be both excellent and long-lasting.
Battery:- Your generator requires a battery to store solar energy. There are many different shapes and sizes of batteries.
- Step 1. Estimate Your Energy Requirements
Here I have mentioned for you to check out the following list of usual power ratings for some of the most popular devices if you need the generator to power your devices as well as the odd item on your boat or portable solar generator for RV, even during a power outage in your home:
- DVD Player: 15W
- CB Radio: 5W
- Modem: 7W
- Laptop: 25-100W
- Drill (1/4 inch) 250W
- Toaster Oven 1200W
- Blu-ray Player: 15W
- Step 2. Check the Equipment
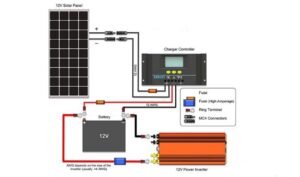
Connect the two pigtail wires from the panel to the proper (+) or (-) charge controller sockets.
Connect the battery to the controller now. A green light on the controller should turn on when the negative cable is connected, indicating that the battery is fully charged.
A second green light on the charge controller should turn on once your panel faces the window and captures sunlight, indicating that the panel is charging the battery.
- Step 3. Building the Generator
Here, you mount all the components and complete a few of the initial wiring for your system.
Mark the Openings and Cut Them
To make the initial marks, use masking tape. You can make adjustments in this manner without damaging your casing permanently.
Trace the lines onto the case according to the real size of each hole. Always cut smaller when in doubt and then, if necessary, file or trim the opening to a bigger size. Use a vibrating multi-tool with a plunge-cutting blade for straight cuts. You can alternate among hole saws or drill bits to create round holes.
Tune the holes with a pneumatic die grinder and a rotary cutting blade trim.
Put External Components in Place
After making the holes, test the fit of the LED floodlight and seal the box’s inside by lining the edges with black silicone sealant. Carefully place the light in the slot once the silicone hardens. There is a rubber gasket on the 120V AC charging port. Thus silicone is not necessary.
Repeat the procedure for the parts on the other sides of the hard case. You will require some silicone sealant for the inverter remote control panel. Self-tapping screws are used to affix the panel.
Install the Battery
Please put it in the corner closest to the case wheels because batteries are the heaviest part. You could place the battery in any direction as long as it is securely maintained within the direction if it is most likely used.
Frequently Asked Questions:-
- If I have solar panels, do I still need a generator?
Yes, even with solar panels, you still need a generator. Therefore, you shouldn’t ever employ both of them simultaneously. Your solar panels are always connected to the grid, though the generators may supply power for things like lighting in an emergency.
- What can a solar generator power?
The Bluett Off-Grid Solar Generator AC200P is ideal for going off the grid. Most high-power devices like a refrigerator, window air conditioners, hairdryers, microwaves, coffee makers (max 2000W), heaters, electric grills, drills, etc., can be charged with this. Some micro hydro power generator can also use to power many important appliances.
- How much power does a refrigerator use from a generator?
Between 100 and 800 amps are used each hour by refrigerators and freezers. Using a generator that generates at least 2000 beginning watts, it can operate the freezer and refrigerator without issues.
- How long can a solar generator run?
It can power a 110W television for 15 continuous hours, a 120W refrigerator for 14 hours, and a 40W CPAP machine for just an essential 34 hours. Expandable solar generators featuring extra battery options can give you more than double the power provided.

- How many times can a solar generator be charged?
The typical lifespan of a lithium battery is 200 to 500 cycles. The life duration is the greatest number of charge-discharge cycles a battery may experience until its capacity is less than 80% of its starting point.
- How long does a solar power generator last?
Between 25 to 35yrs, The typical solar generator would last around 25 and 35 years in total. It is a wise investment for your family and has a lifespan similar to a good roof. Sunlight is the source of power for solar generators.
- Is solar generator power a refrigerator?
Yes. Furthermore, there are some factors to consider while selecting the finest solar generator for refrigerators. It would help to consider how much power your refrigerator uses.
- What is the main drawback of solar energy?
Intermittency. The fact that electricity can only be produced when the sun is shining is among the main issues with solar energy technology. This means that the supply may be interrupted on cloudy days and at night.
- What three problems exist with solar energy?
Long ROI and high upfront material and installation expenses (however, with the reduction in the cost of solar over the last 10 years, solar is becoming more cost feasible every day) need a lot of room because efficiency isn’t yet 100%. Due to the lack of solar power at night, a sizable battery bank is required.
- How long can a solar generator run a refrigerator?
The EcoFlow DELTA Solar Generator is a fantastic illustration of a generator that can keep your perishables cold for an extended period. A 120W refrigerator may be run continuously for 7.5 hours on the EcoFlow DELTA. Just based on battery storage, too.
- What advantages do camping solar setup?
Solar energy is a natural, renewable, and, best of all, cost-free clean energy source. You can visit unpowered and isolated areas using a good portable solar power system without giving up refrigerators, LED camping lights, mobile gadgets, and much more.
The Final Words
As I mentioned in the article, you can purchase a solar generator that is already built and suits your demands. Therefore, if you already have all the necessary tools and have some basic electrical knowledge, you may build one yourself and take advantage of its many advantages.
In addition to being far less expensive than one manufactured in a factory, a DIY generator allows you to customize many components.
In my opinion, staying independent from the grid and demonstrating that you might use your knowledge and talents to do so are the main goals of creating a solar generator from scratch.
Ray is an avid reader and writer with over 25 years of experience serving various domestic and multinational private and public energy companies in the USA.