
Making a solar panel with household items offers an accessible and eco-friendly solution to power needs. In this guide, we’ll walk you through the process, empowering you to generate clean energy right at home.
As we all know, solar panels harness the solar energy from the sun and convert it into electrical energy in a very sustainable manner. It also helps to reduce your home’s energy costs because solar energy is free. It does not emit any harmful substances into the environment.

But solar panels require a higher initial payment before their installation, which can sometimes be a problem for those who have a small amount for investment and small business owners. To overcome this problem, I have found the solution: to make solar panels at home without any higher cost.
After making solar panels you need to know at which angle you should place your solar panels to get the maximum output. For this, you need to know how to calculate the tilt angle.
Understanding & Process of Making Household Solar Panels
Household solar panels are scaled-down versions of commercial solar arrays, designed for residential use. While professional installation is common, making a solar panel at home offers a DIY alternative, allowing for cost savings and customization.
Materials Needed
To start on your solar panel project, gather the following household items:
- Solar Cells: Obtain solar cells, the core component responsible for converting sunlight into electricity. These can be purchased online or salvaged from old electronics.
- Wooden Frame: Construct a frame using readily available wood to hold the solar cells securely in place.
- Glass Sheet: Acquire a glass sheet to cover the solar cells, protecting them from damage while allowing sunlight to pass through.
- Soldering Iron and Solder: These tools are necessary for connecting the solar cells in series to form a panel.
- Tabbing Wire and Bus Wire: Used for connecting the solar cells together and routing electricity.
- Silicone Sealant: Seal the edges of the glass sheet to the wooden frame to prevent moisture ingress.
- Diodes: Install diodes to prevent reverse current flow, ensuring efficient energy production.
Constructing the Solar Panel
Now, let’s dive into the step-by-step process of assembling your homemade solar panel:
Step 1: Frame Preparation
Begin by crafting a sturdy wooden frame to accommodate the solar cells. Ensure that the dimensions match the size of the solar cells to be used.
Step 2: Cell Layout
Arrange the solar cells within the frame, leaving space between each cell for wiring and connections. Secure the cells in place using adhesive or screws.
Step 3: Wiring Connections
Using tabbing wire, connect the solar cells in series, ensuring proper polarity alignment. Solder the connections carefully to create a seamless electrical circuit.
Step 4: Encapsulation
Place the glass sheet over the solar cells and affix it to the wooden frame using silicone sealant. This encapsulation protects the cells from environmental elements.
Step 5: Electrical Components
Install diodes in strategic locations to prevent reverse current flow, optimizing the efficiency of the solar panel.
Step 6: Testing
Before deployment, conduct thorough testing to ensure proper functioning and electrical output of the solar panel.
Other Ways to Make a Solar Panel With Household Items:-
Making Solar Panels With the Help of Aluminum Foil

There are some items you are required to make a solar panel with aluminum foil. They are
- Glass
- Aluminum foil
- Copper wire
- Insulated electrical wire
- Soldering iron
- Wire cutters
Step 1- Attach the copper wire to the glass: First, you should get a square glass. Next, you should attach the copper wire (with the help of glue) to one end of the mirror and extend the wire to the other end, then again attach the wire to the glass.
Repeat this step until you are done with all of your glasses.
Step 2- Cover the glass with aluminum foil: After the completion of step one, now it’s time to cover all your glasses in aluminum foil. Here is a tip: “Always cut the aluminum foil larger than a glass piece so it can cover the whole glass.” Always leave the glass ends with copper wire visible to your sight so you can easily attach them to power your devices.
Step 3- Test the solar panel: After completing the above steps. Now, it’s time to test your solar panels. For this purpose, connect the copper wires of your panels to the voltmeter. Keep your solar panel under direct sunlight and check the voltmeter energy reading. If the current is detected, then your panels are working.
Now, you have successfully made your solar panel with the help of aluminum foil.
Making Solar Panels With the Help of Soda Cans
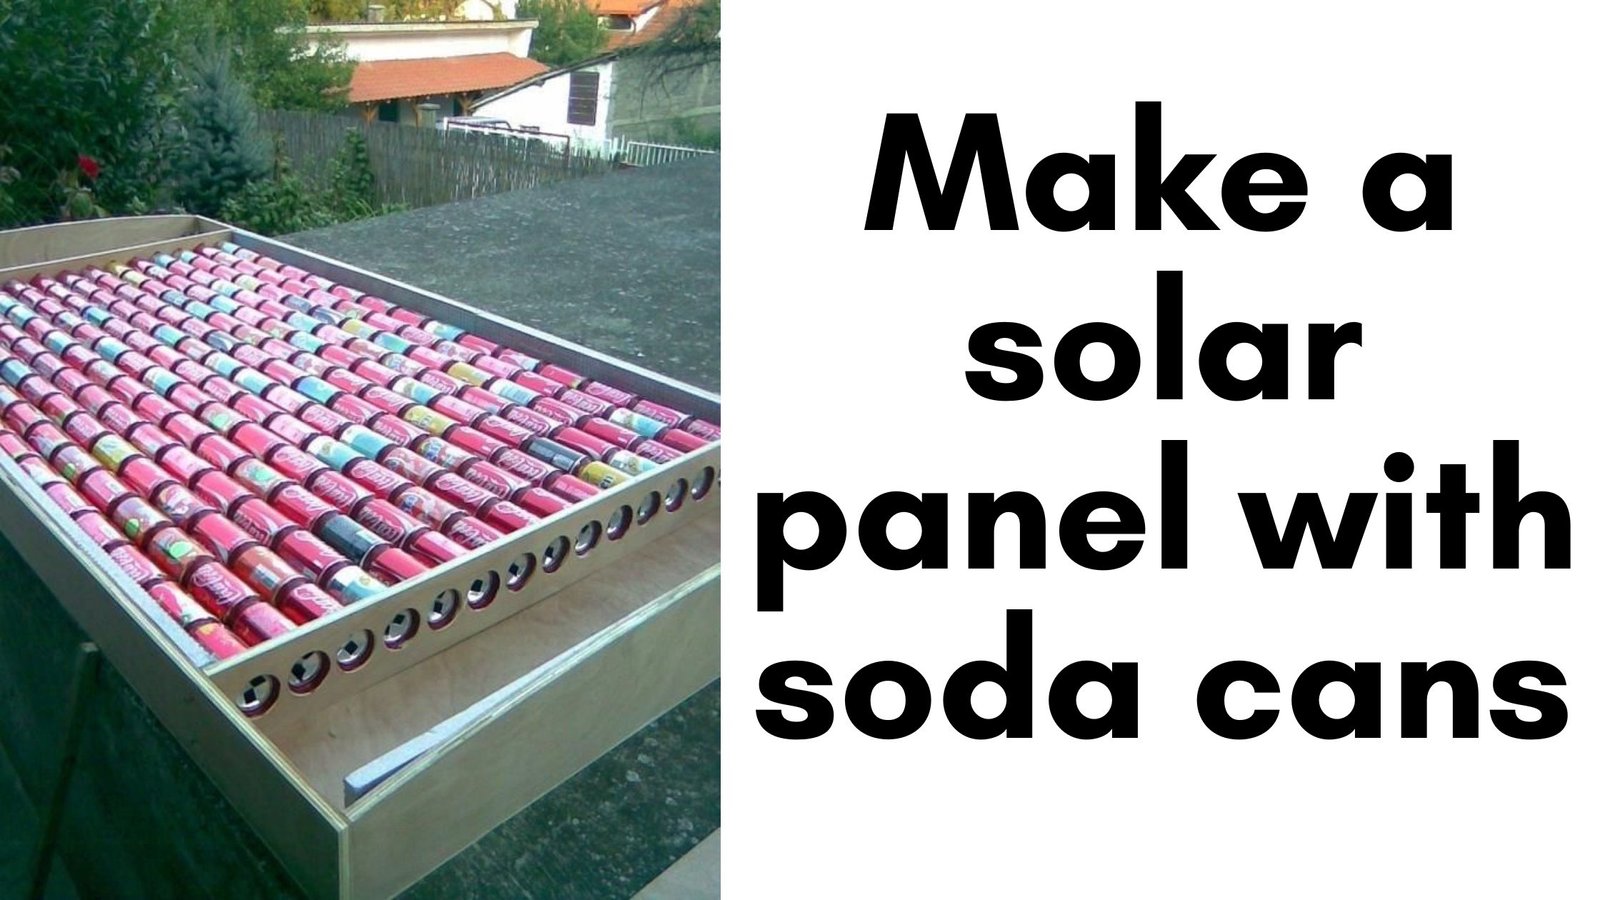
There are some items you are required to make a solar panel with a soda can. They are
- Soda cans
- Silicon adhesive
- Plywood or sheet metal
- Black spray paint
- Polycarbonate sheet
- Tubes for air intake and output
- Exhaust fan or air pump
Step 1- Cut your soda can: The first step is to cut off the top of each can and remove the bottom fins. The way the cans are cut can create a turbulent airflow, increasing the amount of heat collected inside the panel.
The number of cans you need for your solar panels depends on how big you want your system to be.
Step 2- Attach the soda cans: Now it’s time to attach them, one on top and one alongside the other, to form a big sturdy block. You should attach the cans with the help of silicon adhesive because it has an extraordinary resistance to endure temperatures up to 400 degrees Fahrenheit.
Step 3- Make a wooden or metal frame: Make a wooden or metal frame of the right size to hold all your soda cans. The back of that frame can be made of wood or metal, but the front has to be made of glass or polycarbonate to maximize sunlight absorption.
Here is the tip, spray your cans and frames with black paint. It can help your panel absorb more sunshine.
Step 4- Install the tubes: Install the intake tube at the top of the frame and the outtake tube at the bottom.
Step 5- Test the solar panel: The final step is to attach the exhaust fan to the intake tube to draw cool air from the room into your panel. Connect the second fan to the output tube to recirculate the warmed air into your living area.
Now, you have successfully made your solar panel with the help of a soda can.
Making Solar Panels With the Help of CDs
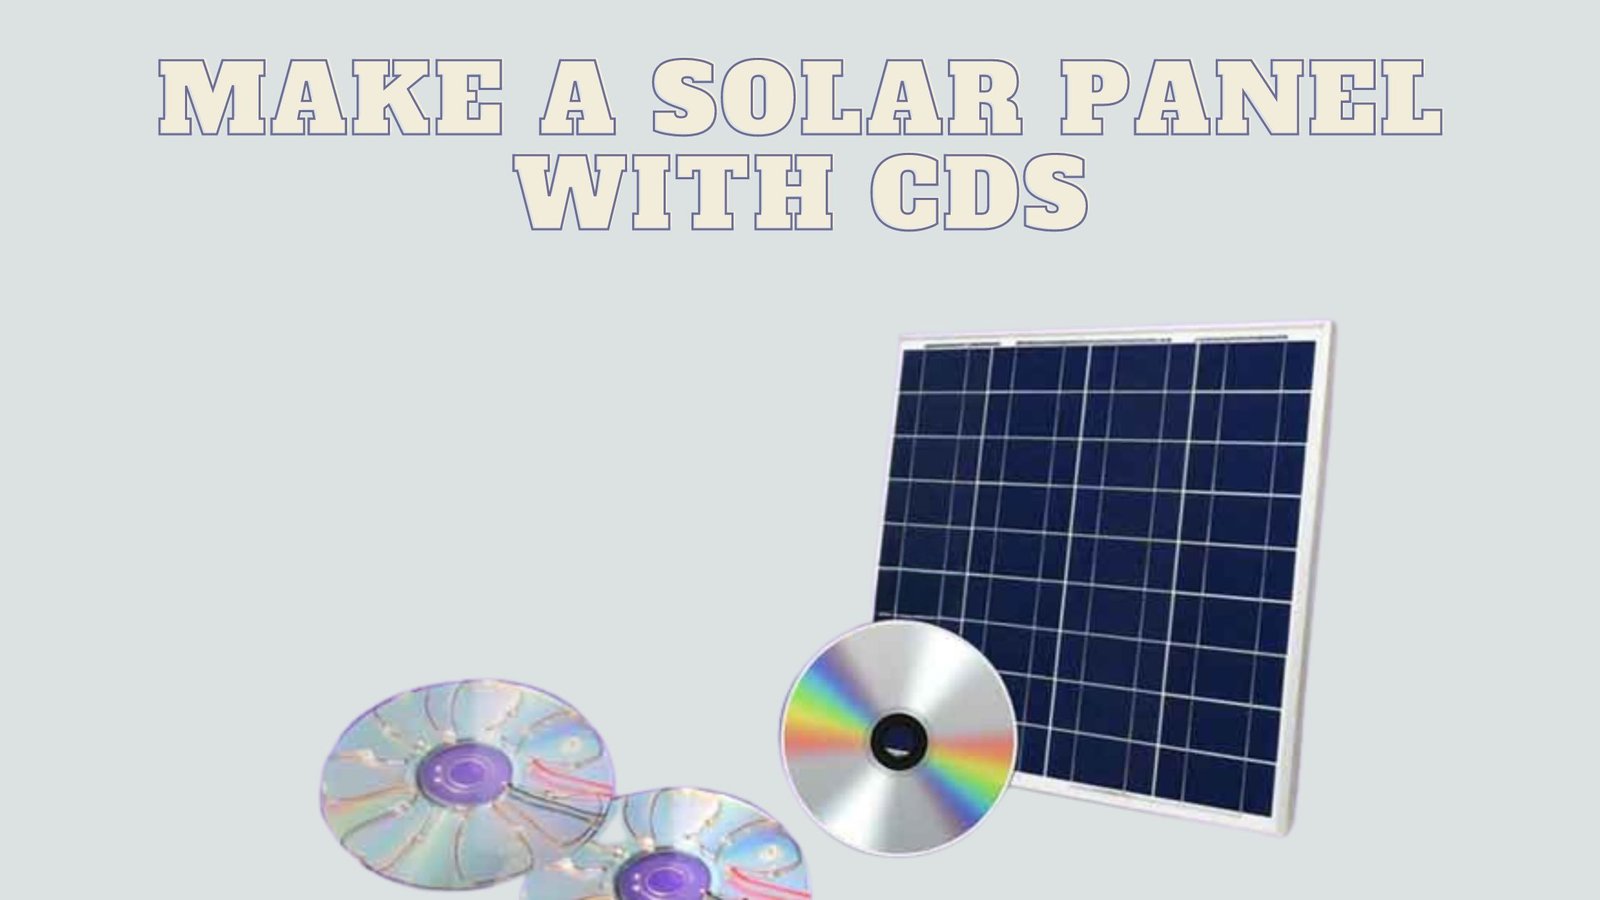
There are some items you are required to make a solar panel with CDs. They are
- CDs
- Cardboards
- Zener diodes
- Copper wire
- Insulated electrical wire
- Glue
- Soldering iron
- Wire cutters
- Voltmeter
Step 1- Stick the copper wire to the CDs: Add the copper wire to the CD’s center hole with the help of adhesive, stretch it back to the outer end of the CD, and bring it back to the center. Secure the wire with the use of adhesive.
Repeat this process until the CD is fully covered by copper wire.
Step 2- Attach the Zener Diode: You must attach the Zener diode to the gaps between the copper wires. Just solder the Zener diode’s ends to the ends of the copper wires. Leave one end unconnected, as it will be used to connect the insulated wires.
Step 3- Connect the insulated wires: Next, we will connect the insulated wire to the copper wire, which was left unconnected in the previous step. Just add the insulated wire to the end of the copper wire, and it’s done.
Step 4- Test the solar panel: To test this, we have to put our homemade solar panel under the sun and use the voltmeter. Now, connect the insulated wires of your solar panel to the voltmeter. If everything is correct, then the voltmeter will read the energy reading. This means your panels are correctly made.
Now, you have successfully made your solar panel with the help of CDs.
Making Solar Panels With the Help of Blades

There are some items you are required to make a solar panel with blades. They are
- Blades
- Cardboard
- Copper wire
- Glue
- Voltmeter
Step 1- Attach the blades: The first step is to add the blades to the cardboard with the help of adhesive. Create bifacial DIY solar panels by placing blades on one side of the cardboard and some on the other. The blades have to be placed near one another.
Step 2- Connect the Blades: Now, it’s time to connect the blades using copper wires. For this purpose, we must attach a copper wire on one side of the panel and repeat the same on the other.
Here is the tip, you can also use aluminum foil instead of copper wires to connect the blade.
Step 3- Test the solar panel: Finally, we can test this panel with the help of a voltmeter. Place your panel in direct sunlight. Add the two wires from your panel to the voltmeter and check whether it shows the current readings.
Now, you have successfully made your solar panel with the help of Blades.
Benefits of Homemade Solar Panels
1. Cost Savings: Making your own solar panel can be significantly cheaper than purchasing one commercially.
2. Educational Value: DIY solar projects offer valuable learning experiences, promoting sustainability and innovation.
3. Customization: Tailor the specifications of your solar panel to suit your energy needs and available resources.
Frequently Asked Questions:-
- Are homemade solar panels safe?
When constructed and installed correctly, homemade solar panels are safe to use. However, proper precautions should be taken when working with electrical components.
- How much does it cost to make a solar panel at home?
The cost can vary depending on the size and quality of materials used, but DIY solar panels can typically be made for a fraction of the price of commercial ones.
- Do homemade solar panels work as effectively as commercial ones?
While homemade panels may not match the efficiency of commercial-grade systems, they can still generate significant amounts of electricity when properly constructed and installed.
- Why should we use silicone adhesive in our solar panels?
As we know, solar panels are placed under direct sunlight; that’s why we always suggest using silicon adhesive in our homemade solar panels. The silicon adhesive has a high resistance to temperatures up to 400 degrees Fahrenheit.
- Why do we require a voltmeter for our solar panel system?
We require a voltmeter for our solar panel system to check the current readings flowing through the solar panels. With the help of a voltmeter, we can check whether our solar panel system is working. It also helps in analyzing the workings of our homemade solar panels.
- How long do DIY solar panels last?
A regular solar panel can last up to 25 years but still requires timely maintenance. Hence, DIY solar panels are made in homes with the help of household materials, which are subject to requiring care because the quality is not guaranteed. As a result, we are still determining the exact lifespan of DIY solar panels.
- Can I connect homemade solar panels to the grid?
It’s possible to connect homemade panels to the grid with the appropriate equipment and regulatory approvals, but professional guidance is recommended.
- Are there any government incentives for homemade solar panels?
In some regions, government incentives or rebates may be available for renewable energy projects, including DIY solar installations. Check local regulations for more information.
Conclusion
Solar energy is improving daily with the help of coming technological advancements. As we all know, solar panels are still expensive. That’s why I have put down all the information regarding making solar panels inexpensively with the help of household materials.
Making a solar panel with household items offers not only a sustainable energy solution but also a rewarding DIY experience. By following the steps outlined in this guide, you can harness the power of the sun to reduce your carbon footprint and contribute to a greener future.
Ray is an avid reader and writer with over 25 years of experience serving various domestic and multinational private and public energy companies in the USA.